Today I am going to show you how to make a cross stitch lampshade that you can use on a lamp or as a shade for a ceiling light.
No time to read this post? Just pin an image for later!
*This posts contains affiliate links, but I only ever recommend products I have used myself.
What you will need:
- 20cm Lampshade Making Kit* – or bigger, but I will be talking about this specific size. You get everything you need in the kit I have linked, including instructions. The instructions here are a slightly expanded version with some extra tips, and adapted for a cross stitch lampshade.
- Fabric – aida/evenweave at least 25×10″ – the bigger the better
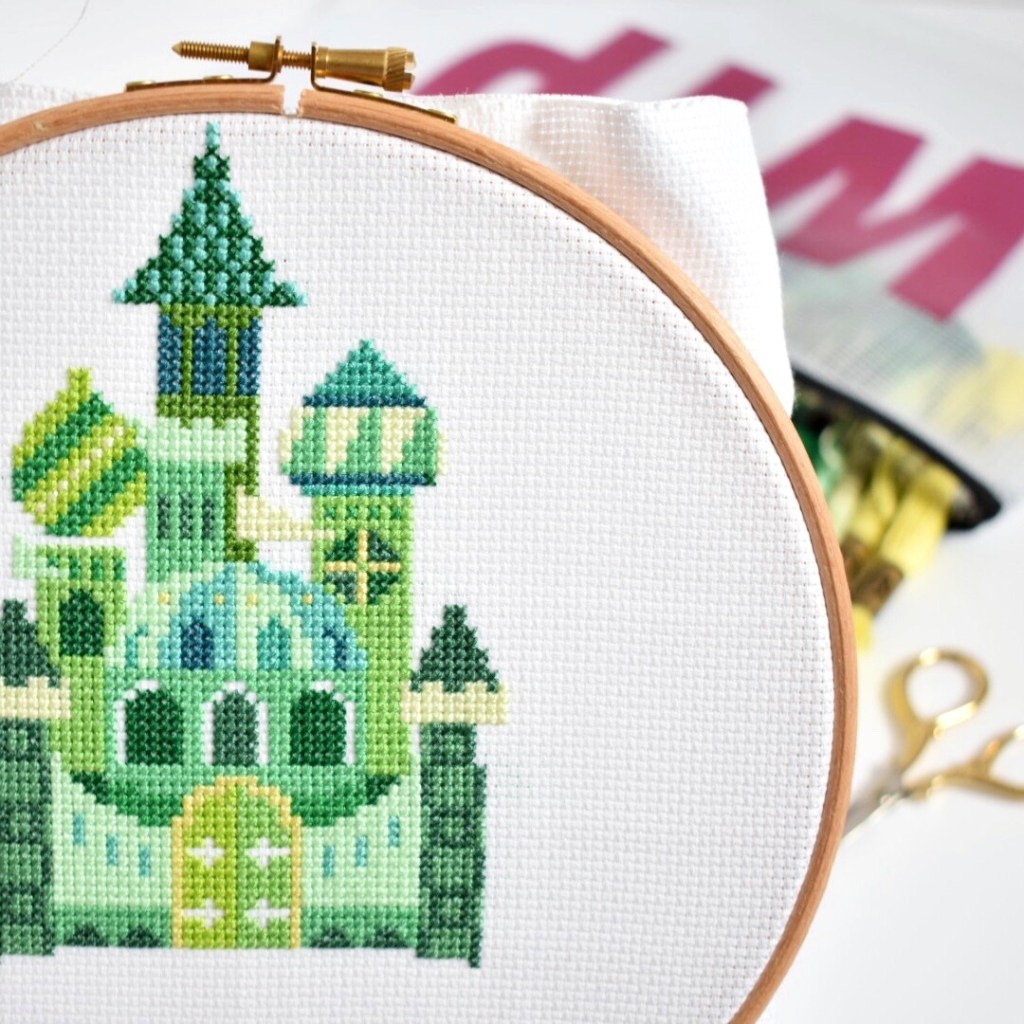
- A cross stitch pattern to stitch – I have used The Emerald City from Satsuma Street
- Some weights – I used books
- A cutting board
- Scissors
- A rotary cutter (optional)
- A sewing machine (optional)
- A lamp (optional depending on how you use your shade)
A little note here -please ensure the kit or backing you buy conforms to your country’s fire safety regulations. The kit I have linked has been tested and passed the glow wire test carried out by the Lighting Association.

I first cast my eyes on this Emerald City pattern from Satsuma Street in Spring 2016 and knew right away that I had to stitch it. I had no idea what to do with it though; no one in our house was a particular fan of The Wizard of Oz.
However, my mum was. But she wasn’t really a fan of hanging things on the wall, so I wasn’t sure she would appreciate a hoop hanging or even a framed piece.
I’m not sure where I got the idea for a lampshade from, but my mum really likes lamps. In fact, growing up it was always lamps and candles used to light a room.
So had I ever made a lampshade before? No. Did I even know if it could be done with a finished cross stitch piece? No. But I like to try new things so in Spring 2018 (yes, 2 years after I first saw this pattern!) I started stitching.
When you are finding a pattern to stitch for your lampshade, please check the pattern measurements… and then check them again. In hindsight, I would have stitched my pattern on 16 count aida instead of 14. I thought the finished hoop was 8 inches, so I bought a 20 cm lampshade drum kit*.
The finished hoop was actually 9 inches and a 20 cm drum kit only gives you about 7 inches of height for your design. But hey, that’s what I’m here for! To make all the mistakes so that you don’t! There are plenty of other sizes from 15-45 cm.
I would have also used evenweave to stitch on to make the rest of the shade look a little better, but again hindsight!
How to Make a Cross Stitch Lampshade in 10 Steps
Step 1 – Prepare your fabric
I skipped this step thinking I wouldn’t be stitching very long. This design ending up taking me 9 months to finish; the time it takes to grow a baby! And there was still more I wanted to do with it.
To prepare your fabric I recommend just simply securing your edges to stop it fraying.
You can do this with a zig-zag stitch on your sewing machine all the way around the fabric.
Or you can use a fray check product such as Pyrm Fray Check*.
Or you can do what I did (and still do when I’m being a bit lazy) and roll up the edges and secure with a binder clip.
Step 2 – Stitch your pattern
The fun part! Stitch your design in the centre of your fabric (this will be the “front” of your lampshade).
If you already have a finished piece you would like to use you can attach it by either stitching or gluing it to a piece of backing fabric cut to the size above.
A little tip; when you are snipping those threads as you come to the end of your row/colour/thread – cut them as close to your aida as you can.
I did not do this and they get sort of flattened against your aida when you’re making the shade and can be noticeable through the aida.
Same with trailing your threads; I recommend trying not to do this as much as possible when stitching a design for a lampshade.

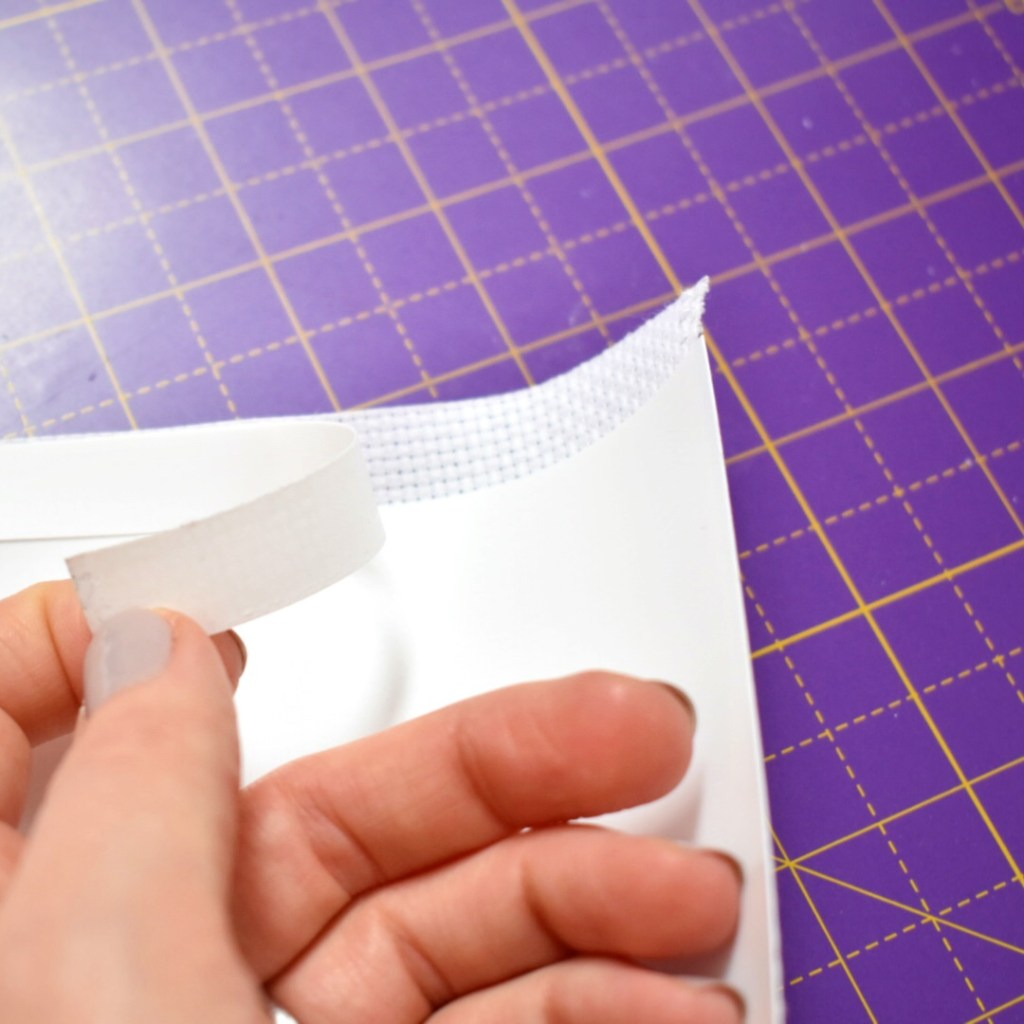
Step 3 – Attach the PVC panel
Place your aida right side down and line up the PVC panel that comes in your lampshade kit on the back of it, making sure your design fits nicely in the centre.
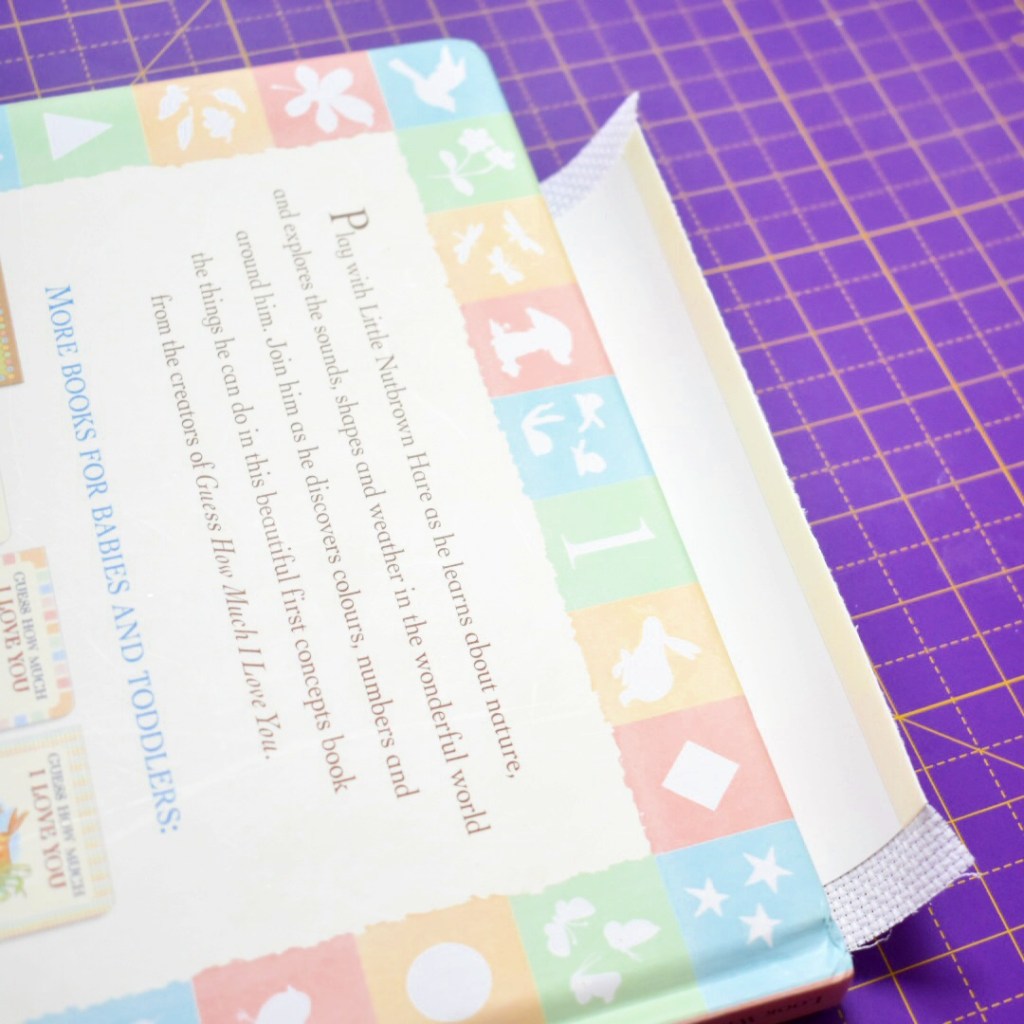
As the backing comes rolled up I found it quite difficult to lay it flat so I stacked some books on it.

You could try flattening it beforehand, but keeping it rolled makes the next steps a little easier.
Slowly peel off the protective layer and start sticking it onto your aida section by section (moving your weights/books as you go).

Step 4 – Cut your excess fabric
Cut down your aida to the edges of the backing. You can use scissors or a rotary cutter here and don’t worry if you can’t line it up exact; all of these edges will be covered on your finished piece.

Step 5 – Snap off the top and bottom
There are perforated lines for you to snap off the top and bottom.

When you have snapped them off you need to peel the back away.
If (like me) and your design was a little bigger than you thought and some of it goes over the lines to snap off, just be careful as you are peeling over the back of your stitches.
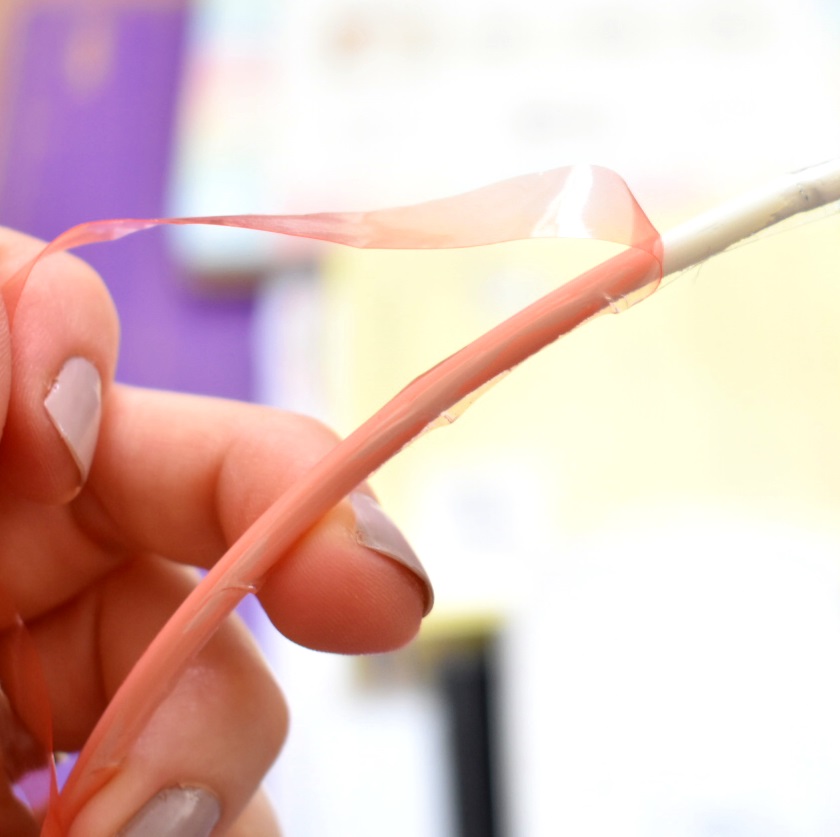
Step 6 – Tape the edge
Put some red tape along the edge that you want to overlap.
It may not matter which edge this is for you, but I had a little selvage on one end of mine so I needed that to be the ‘under’ part.
Take off the top layer of tape too so it’s ready to stick.
Step 7 – Prepare your rings
The fiddly bits are coming up now.
First, stick the red tape all the way around both of the rings.

Then wrap the red tape around the edges and peel the top layer of tape off to make them sticky!

Step 8 – Roll it up
Before you start this step you need to decide how your shade will sit. Is this a lampshade so the part for the bulb to sit in is at the bottom? Or a light shade (for the ceiling) so it’s at the top?
Will it sit up or hang down is how I like to think of it.
To help you, my lampshade is sitting up, and the part for the bulb (the utility ring) is at the bottom.
This is important so your design is not upside down when you’re using your shade.
Once you have decided, place your rings at the end of your fabric (the end without the line of tape at the edge).

Start rolling slowly, trying to keep the rings as straight as possible and as close to the PVC panel as you can get.

As you roll you will have to remove some weights/books and about halfway down come to the front and start rolling from there.

Once you reach the end your overlap should be lined up nicely, so put your hand on the inside of the shade and press down firmly so the edges stick together.

Step 9 – Finish the edges of the lampshade
On the utility ring side, snip your fabric in line with the struts from the ring so you can fold it behind.

To fold it in, pull your excess fabric gently over the ring and stick it down (they are still covered in tape).

Then use the finishing tool you get in the kit to tuck the fabric under the ring and give it that professional finish (or you can use a bank card too if you need something a little stiffer).

Step 10 – Attach it to a stand/light fitting
Now you are ready to use your shade where ever you wish!

I had so so much fun making this, and I have loads more ideas for lampshades in the future.
Aren’t they just the best present? Useful and thoughtful; my favourite kind of gift!


If you make a lampshade I would love to see it! Come and join my Facebook group to share your Makes!
And if you need some help planning this project, be sure to download your free planning sheets.

Pin for later!

Related posts
- How to Cross Stitch Guide for Beginners
- Hints and Tips to Make You a Professional cross Stitcher
- How to Make a Cross Stitch Banner
