In this post, I am sharing how to make a cross stitch corner bookmark in 7 steps.

I love reading and you can keep up to date with my seasonal reading lists right here on the blog.
I usually have a few books on the go at once which means I need lots of bookmarks. Plus, my kids love pulling them out of books and playing with them.
I love these corner ones because they’re a great way to use up any small pieces of aida you have lying around, they’re quick to make and if you put the design on the bottom corner instead you can make little money/gift card pouches too!

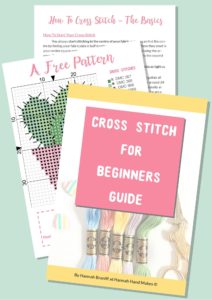
Free Guide
Sign up and get your free Cross Stitch for Beginners guide sent straight to your inbox.
*Affiliate link. If you click on my link I may earn a small commission. This is of no extra cost to you and I only ever recommend products I love and use myself.
To Make Your Cross Stitch Corner Bookmark You Will Need:
- A cross stitch design (I used my personalised floral pattern which you can download in my Etsy shop here).
- 2x pieces of fabric 5 x 5 inches.
- Aida or evenweave to stitch on – 7 x 7 inches (I recommend the brand Zweigart which you can get from Love Crafts here*, or DMC).
- Threads to stitch with (you can get DMC and Anchor threads from Love Crafts here*).
- Cross stitch needle.
- Interfacing (optional).
- Sewing machine (optional).
- Pins or clips.


7 Steps to Make a Cross Stitch Bookmark
Before I made my bookmark with my cross stitch design I actually practiced making it with normal fabric to test it all worked OK.
In fact, I made two because the first one I messed up and the second went better but I knew I could improve it.
3rd time lucky I loved how it turned out.

And then I even made another one with a different technique to see how that looked which I will share at the end of the tutorial.
If you aren’t the most confident at sewing then you could also have a test run first. But, if you follow these steps exactly you should be OK. I make the mistakes first so you don’t have to 😉
1. Stitch your design
First you need to stitch your design onto your aida/evenweave. I used my floral bookmark design and stitched on 32 count, white evenweave.
When you are stitching, don’t start in the middle like you traditionally would with a cross stitch project. You want your design to sit in the top right corner, but not too close to the edge.
Leave around a 1-1.5 inch margin at the top and right edge and start over in the right corner (we will cut this down again later).

And if you want to make a little pouch instead of a bookmark stitch in the bottom left corner.
2. Cut your design out
Now you need to cut out your design. Start at the top and leave 0.75 inches from the top square of your design and cut straight across. Do the same for the right edge.
Now cut the bottom and left edge so your aida/evenweave is 5 x 5 inches.
Next, cut your interfacing so that it is also 5 x 5 inches and cut it diagonally across so it is now a triangle shape.

3. Iron
Iron on your interfacing in the top right corner so it covers the back of your design.

Then fold over your aida/evenweave so it is also a triangle and iron the fold.

4. Pin it Together
Place the piece of fabric you want behind your design right side up, then put your design on top in the corner.

Next, put the piece of fabric that will go at the back right side down on top and pin/clip it all together carefully.


As my fabric was just a solid colour it didn’t matter which way around I placed the fabric.

Planning Sheets
Plan your cross stitch projects in style with these FREE planning printables.
DOWNLOAD NOW
5. Sew it Together
Next, you need to sew it all together. You can use a sewing machine or stitch it by hand using a running stitch (however if you are hand stitching I recommend my other technique below).
Leave a 0.5-inch seam allowance around the outside; the smaller allowance makes it look a little neater.
And don’t forget to leave a gap at the bottom to turn it the right way around. I totally forgot this on my first attempt LOL!

As you can see from the photo I left quite a big gap to turn it.

6. Poke and Iron
Once your corner bookmark is the right way around poke out the corners using either a knitting needle or chopsticks or just something that will get right into the corner without damaging the fabric.

Then iron the edges down, including the gap at the bottom.

7. Close the Gap
To close the gap you can either use a ladder stitch by hand or just use your sewing machine to topstitch it closed.
Again, I used a 0.5-inch allowance, but I didn’t topstitch the whole way around. My sewing machine is only a mini one and doesn’t take many layers, so I just stitched over the cotton and left my evenweave.

I actually prefer this way though as when you top stitch all the way around your bookmark sits a little differently on the book (I know this from my second test).
You’re done!
Yay, it’s finished! So pop it on your book and enjoy!
I think these cross stitch corner bookmarks make great gifts and I enjoyed making mine so much. Every reader in my family can expect on as a gift over the next year!

Quick, No Sewing Machine Technique
Here’s another quick technique you can use as well which I recommend if you don’t have a sewing machine.
(This was really quick for me and I just used an old design I already had hence the off center-ness of it).
Cut your cross stitch design into a triangle shape and cut a piece of felt just a little bit larger than it.

Backstitch along the top and right edge, using your squares as a guide (I stitched every other square).

Use some fray check on your edges for a bit of extra protection and you’re done! How easy was that?

I actually love both versions of these but I think for this quick and easy one your design really needs to be stitched on aida just to prevent it from fraying too much.
If you want to try that second technique with evenweave though, you could fold in your edges first just to make sure it stays secure.
Show me what corner bookmark you make on social media and tag me @hannahhandmakes or use #hannahhandmakes on your photos.
Pin for Later

Extra Cross Stitch Resources
- 5 Finishing Ideas for Your Cross Stitch
- How to Make a Cross Stitch Lampshade
- 15 Cross Stitch Hints and Tips
- How to Cross Stitch on Evenweave

I loved this. Thanks. By the way, would you happen to know how to do “reverse ease”? it’s for aida cloth for a bookmaker in how you do the stitching and the back looks exactly like the front only in reverse. you can’t do words. Can you help me?
Hi Edna, sorry for the delay in response. Could you please email your question to hannah@hannahhandmakes.com? It will be easier to help you via email. 🙂 Thanks.
I love those bookmarks. Thank you, I will be making these for all my neighbours. We ladies get together for an afternoon of getting to know each other. This book mark will make easy gifts for everyone, not just the hostess. Your instructions are so good and easy to follow. Again, thank you so much, you are very talented. Keep up the great teachings. Heather in Ottawa, Ontario. 🇨🇦