In this episode/post, I’m sharing how to prepare your cross stitch project before you even start stitching.
You can listen to the episode below or keep scrolling to read the blog post.
*This post contains affiliate links. I only ever recommend something I have bought and used myself
I don’t always do every tip mentioned here for every project; it depends on how big the design is, what fabric I use and honestly … if I can be bothered.

Free Guide
Sign up and get your free Cross Stitch for Beginners guide sent straight to your inbox.
1.Plan Your Project
I always recommend planning your project before doing anything else and this is something that I do for every project.
This can be as simple as jotting down on a piece of paper everything you need to stitch the design before you start, and making sure you have enough of it. There’s nothing worse than being halfway through your stitching and realising you’ve run out of a colour.
Or if you want something a little more structured to plan your projects you can download free cross stitch planner sheets if you sign up to the newsletter or you can buy the full PDF planner which you can download and print at home! If you at interested in more planning tips I have a whole blog post on how to plan your projects.
2. Buy Your Cross Stitch Materials
In the free planner sheets, there is room to write down a little shopping list for anything you might need for your project.
My favourite shops for supplies are Love Crafts* Sand Cloud Craft.
Or you can buy a full kit and not have to worry about buying supplies! I sell many kits in my shop and I recommend kits and patterns every month on The Cross Stitch Podcast.
Another thing you could do is double check your stash to see if you have a similar colour already instead of buying all new ones. This is a great way to save some money and use up some of your stash!
3. Wash Your Fabric
Depending on what you are doing with your finished piece you may want to wash your
For example, if you are making a cushion washing your fabric first can ensure your fabric won’t shrink a little after you have made the cushion and need to wash it after using it
I love DMC and Zweigart aida* as it is perfect to stitch on as it comes; not too stiff or soft.

Peace SAL
Join the Peace, Calm and Happiness Mystery Stitch-a-Long to find calm in the chaos.
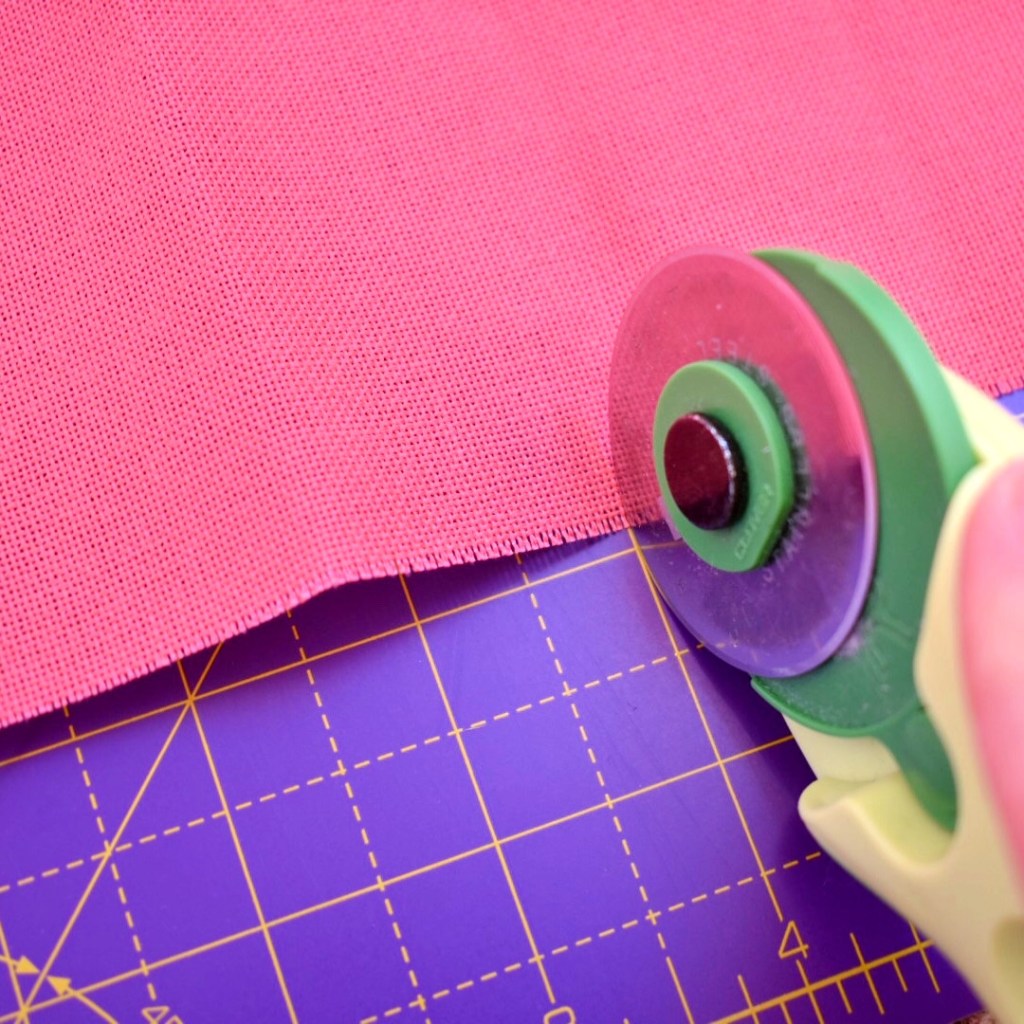
4. Cut and Secure the Edges of Your Fabric
Cut your fabric to the size you need, remembering to leave a good size around the edge of your design area to allow for any miscalculation you may have made (we’ve all done it!). I usually aim for at least 2 inches around for the margin.
You can either cut to the size of the design (plus that extra bit) or cut to the size you will need for finishing/framing, plus the extra margin.
There are many ways to secure your edges, and you may not want to do it at all. I tend to only secure if I’m using evenweave/linen or if the design is particularly large.
Use masking tape
This is very simple; you just tape around the
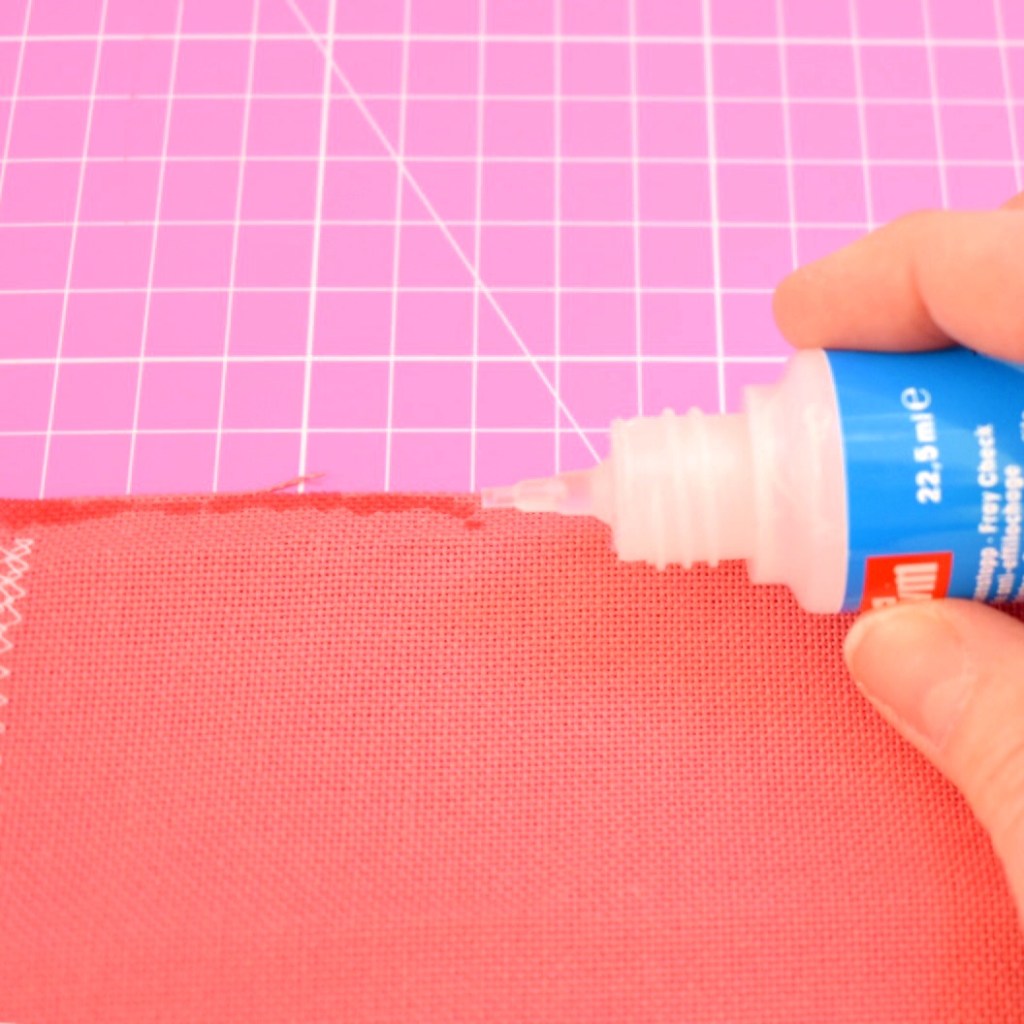
Use Prymm Fray Check*

You just dab this along the edge of your fabric and it secures the edges, stopping them from fraying. This is usually what I do on smaller designs that use evenweave.
Use a sewing machine to zig-zag stitch around the edge

This is what I do if the design is particularly large. Or you can hand stitch around the edge using a whip stitch.

Roll it up!
You could also just roll your fabric up and use binder clips to keep it in place. This works to secure the edges on pretty small projects, but it’s also a good idea to do this is if you have a lot of extra fabric around the part you’re stitching.

5. Sort Your Embroidery Threads
Not something I do very often because I usually like to just dive into a project and I like smaller designs so I don’t have a lot of thread.
But if you are stitching a bigger design or like to have your threads sorted before you stitch here are some ideas for you.
- Wind them on paper bobbins. Then you can write the number at the top of the bobbin and reuse it when you run out.
- If you buy a kit they will probably be snipped and sorted for you saving you this job, but this is something you can do at home too. Just hole punch some holes in card stock to secure your thread on and write the number next to it.
- You can do what I usually do and just snip the ends of the skein and keep the thread in the plastic casings. Snipping it like this means you will have around 24 strands of
thread a the same length and you can just take one at a time out of the skein. - Or you could wind them around pegs and write the number along the top of the peg.
Taking this a step further you could keep your threads organised after you have sorted them. For example, you could keep them in groups of similar colours in or in the order of how you will need them in a bobbin box.
6. Gather Everything Together
Once you have done all the prep, you need to gather everything together into one place so it is ready to grab whenever you get some time for some cross stitch.
If you have a kit it probably already comes in a box or bag so this is something you can reuse to keep everything together.

Or you can buy project bags! I sell some colourful cotton ones that you can stitch on too!

Or I also love Sarah Ashford Studio’s project pouches.

Once it is all together, assign a place to keep the bag so that you don’t spend that narrow bit of time you have to sit and stitch looking for your project!
I keep a few project bags around the house; at the side of the couch, next to my bed, and in some boxes and draws. I even recommend having one in the kid’s bedrooms/playrooms if you have young kids, so we they’re happily playing you can sneak some stitching in.
7. Wash Your Hands
If you are about to sit down and plan on doing some stitching, I recommend washing your hands first. This might not be practical for those moments we are grabbing it to sneak in some quick stitching, but for those times we are about to sit down for a long stitching session.
You might think your hands look clean but you can transfer oils off your hands onto your lovely clean, white aida and this can stain so it’s just a helpful step to get in the habit of doing.
Do you do anything else to prepare for cross stitch? I know some of you will grid your fabric, but this is not something I have tried yet so can’t write about it.
Why not come and share what you do for preparing your cross stitch project in my free Facebook group which has over 1500 like-minded cross stitchers and crafters in? I hope to see you there!
Extra resources
- How to Cross Stitch Guide for Beginners
- Hints and Tips to Make You a Professional Cross Stitcher
- 7 Things I Wish I Knew Before I Started Cross Stitching
Pin for later!


I want to cross-stitch something on the baby blanket I am making for my niece. It is good to know that it would be smart for me to wash my hands before starting to stitch. I didn’t realize that the oils on my hands could ruin what I am doing.
Glad this helped. 🙂